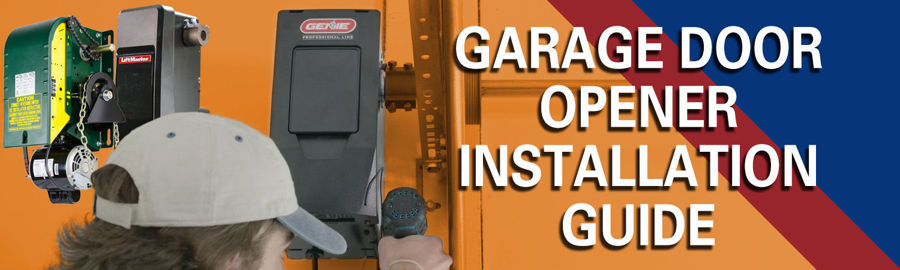
Installing a garage door operator (or opener) can be a challenge, but it doesn’t have to be! While different brands have different installation processes, many are more-or-less the same based on if the opener is a wall mount or a jackshaft.
Action Industries has every part for every door, and we want to ensure that installing said parts is as quick as possible. Read on to find out more about how to install a garage door opener.
How Much does it Cost to Hire a Garage Door Opener Installer?
Garage door installation costs depend on the type of garage door opener and the time it takes to finish the job. Garage door services can range from $150 to $600.
Can You Install a Garage Door Opener by Yourself?
Given the cost of hiring a garage door installer, homeowners may be tempted to do a DIY home improvement project and install their opener themselves. It’s entirely possible to do so, but as with all installations, you can cause serious harm to yourself and others if the installation process is not taken seriously. Be sure to read all instructions carefully and be of sound mind to ensure you can give the installation the attention it requires.
How to install a Residential Garage Door Wall Mount Opener:
Before the installation, gather and take inventory of all the pieces that came in the box. You will also need to prep the tools required for this installation.
Mount the shaft coupler onto the opener output shaft on the side that the operator will be attached to the door shaft. Only tighten the screws on the side of the operator.
Install the opener mounting bracket on the same side as the shaft coupler using the provided bolt step to mount the operator onto the torsion shaft. If your shaft requires a key, use the supplied shaft key and align the coupler to lock it into place. Leave at least a quarter-inch gap between the shaft coupler and the bearing plate.
Once you have the shaft tightened, secure the opener mounting bracket, which should only be secured onto a solid door frame. When both the shaft and mounting bracket are secured, release the cable to allow the operator to spin freely with the door for a portion of the installation.
Mount the door lock on the door track above a roller on the second or third door panel from the floor. You can use pre-existing holes if they are a correct fit or trace and drill new holes to accommodate the mounting of the door. Use the supplied track bolts and nuts to mount and use the supplied door lock wire to connect the door lock to the opener.
Plug the door lock wire into the opener labeled “lock” and cut off the excess wire. Strip a quarter of an inch of insulation off the ends. The door lock wires are polarity sensitive so wire the white wire to the W terminal and the striped wire to the black and white terminal.
Mount the safety beams on each side of the garage door six inches above the floor with the provided lag screws into the wood. If mounting to a concrete block, you will need appropriate concrete fasteners. These can be purchased at a local hardware store.
Mount the safety beams with the photocells facing each other. Wire the safety beams to the operator. This process is not polarity sensitive but must match each beam. Twist the two white wires together and repeat the same process on the striped wires. Insert the wires into the STB terminal by using a flathead screwdrive to press the release tab.
Install the wireless wall console in the desired location in your garage, but no less than five feet from the floor. Pre-drill holes with the appropriate size for mounting the screws and use the supplied drywall anchors if needed. Install the bottom screw leaving a 1/8 inch gap, then slide the wall console over the screw and push it down slightly to lock it into place.
With the battery compartment removed, secure the top screw to the wall and install the supplied batteries. The wireless console will automatically pair with the opener once powered up.
Install the supplied light fixture within 30 feet of the opener and near an active power outlet. Pre-drill two holes seven and a half inches apart and use the supplied drywall anchors if needed. Fasten the supplied screws to leave a 1/8-inch gap.
Route the power cord through the cutout in the light fixture and plug it into the wall outlet. Align the light fixture mounting holes with the screws and turn the light assembly to lock into place. The light fixture will automatically pair with the opener when it is powered up.
Install the battery backup unit on the bottom side of the opener. Make sure the power is unplugged from the opener for this installation. Remove two screws on the bottom of the opener and slide the battery with the mounting tabs into the mounting tab holes on the opener at a 45-degree angle, then plug the battery connector into the BBU connection on the opener. Align the battery with the screws previously removed and secure the battery with those screws.
Plug the opener into an active power outlet. Press the up-arrow button on the opener for two to five seconds until the long LED turns blue, then release. The blue LED will flash to indicate that you are in program mode. Press the down arrow button and hold until the door is fully closed, then press the up-arrow button until the door fully raises. Press the program set button to lock the programming and you're finished!
How to Install a ZAP Jackshaft Operator:
Before installation, have an impact driver socket wrench, monkey wrench drill, pliers a pencil or marker, and a screwdriver on hand.
To mount the operator, slide the operator onto the torsion bar and move it close to the garage door track. Bolt the mounting bracket to the side of the operator. This will then be bolted to the garage door track bracket. Ensure the bracket is completely secured with a socket wrench. Tighten the operator onto the torsion bar.
Mount the release cable and manual release lever. Mount the release cable to the door track using track bolts. Make sure these are tight, then attach the manual release lever below the wire again with track bolts. A monkey wrench or pliers may be needed to help tighten the top bolt. Next, hook the cable onto the release lever and flip it down.
To wire the control box, you need to access the circuit board. Unscrew the four screws on the lid with a flathead screwdriver. Once open, wire the power cable. Push the exposed wires through the holes in the bottom of the box. Take the ground wire and put it into the plug labeled “ground.” Tighten the wire down and make sure no wire is exposed.
Next, locate the black and white wires. These will go into the main power plug. The black wire will go with the live opening on the main supply and the white wire will go on the opening labeled “n.” Tighten these down and plug the wire back in. Take the operator motor cable and plug it into the plug labeled dc motor. The blue wire will go into the opening labeled m1 and the yellow wire will go into the one labeled m2. Once tightened, plug back in and you're good to go.
Mount the powerbox beside the garage door and under the operator. Be sure to mount to a stud or solid surface for a secure fit. Once it's properly secured the power can be plugged into the motor and the control box plugged into a power outlet.
A master reset will allow the control box to calibrate your garage door. Using the instructions on the inside of the box, press the reset button and then the red program button. After a moment, release the reset button and hold the program button until a second green light appears and flashes. Hit the up-arrow button.
Allow the garage door to open fully and wait for the motor to stop. Press the down arrow button and allow the door to fully close. It's normal for the first time to be slow. Repeat the open and close process once more and the control box will be set up. The control box and operator are now fully installed.
Having a garage door opener installed provides your belongings with safety and gives you peace of mind. With so many brands on the market, though, which opener is best for you? Read Residential & Commercial Garage Door Openers: Everything You Need to compare top brands like Liftmaster and Genie garage door openers while also learning about the unique features each brand carries. From smart home devices that turn your phone into a remote control to built-in wi-fi and advanced keypads, make sure your new opener is the right fit for you!